
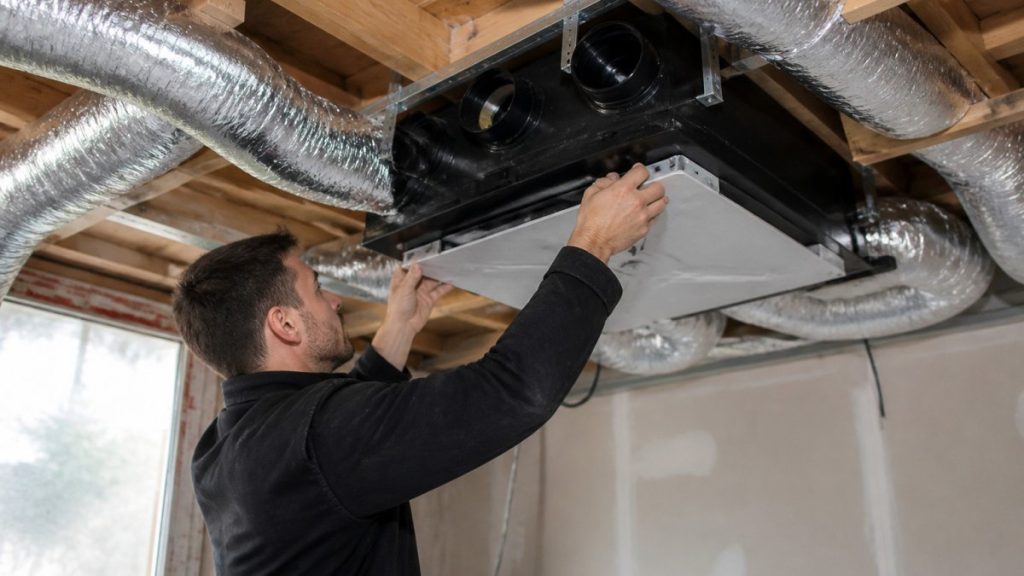
Last Updated: November 2, 2026
Quick Summary
Heat recovery ventilation installation involves assessing your home, sizing the system, planning the ducting, installing the unit and controls, then commissioning airflow in every room. Because the cost depends on your home, you need a quote from a licensed installer rather than a fixed price. Most problems trace back to duct design, so keep runs short, sized to airflow and insulated.
- Size the system by room targets, with supply for living areas and bedrooms and extract for wet rooms and the kitchen.
- Keep supply and extract ducts separate, short and straight, and insulate any run through cold or humid spaces.
- Electrical work, fire stopping and condensate drainage require a licensed installer or qualified trades.
- Measure airflow at every supply and extract point during commissioning, then keep the written balancing record.
Table of Contents
- What a Heat Recovery Ventilator Does and Whether Your Home Needs One
- How Heat Recovery Ventilation Works and How It Differs From ERV
- Heat Recovery Ventilation Installation Cost and What Drives the Price
- Step-by-Step Heat Recovery Ventilation Installation Process
- HRV Ducting Requirements for Supply and Extract Air
- Commissioning and Airflow Balancing for a Heat Recovery Ventilation System
- Booking Your HRV Installation and Ongoing HRV System Maintenance
- Frequently Asked Questions
What a Heat Recovery Ventilator Does and Whether Your Home Needs One
A heat recovery ventilator (HRV) is a unit that swaps stale indoor air for fresh outdoor air while keeping most of the warmth in your home. Heat recovery ventilation installation is worth considering when your home is sealed tightly enough that air stops moving on its own. Our indoor air quality and respiratory health article explains the benefits in more detail. Doctor Damp Ventilation helps Australian homeowners fix the moisture and air problems that build up when that happens.
Sealed homes trap moisture, cooking fumes and carbon dioxide. Without a planned air exchange, mould and condensation tend to follow. Australian Government guidance on home ventilation and indoor air quality
You may need an HRV if you notice:
- Condensation on windows every morning
- A musty smell that returns after cleaning
- Mould on walls, ceilings or in wardrobes
- Family members with asthma or allergies that seem worse indoors
How Heat Recovery Ventilation Works and How It Differs From ERV
An HRV has two air streams that pass close together inside a core, called a heat exchanger. Warm stale air leaves the house and gives up much of its heat to the incoming fresh air. The fresh air arrives at a more comfortable temperature, and the two streams never mix.
An energy recovery ventilator (ERV) works in a similar way but also transfers some moisture. For a side-by-side look at ducted systems and simpler wall vents, see our comparison guide. An ERV suits humid climates, while an HRV is typically chosen for cooler areas.
- HRV: Transfers heat only
- ERV: Transfers heat and moisture
- Best for HRV: Cooler climates, homes with excess moisture
- Best for ERV: Humid climates, homes that run dry in winter
Heat Recovery Ventilation Installation Cost and What Drives the Price
We do not publish fixed prices for this work, because the cost depends on your home and the system required. Your quote will reflect the factors below, and you can request one from Doctor Damp Ventilation for a figure based on your property.
Key cost drivers include:
- The number of rooms and the total floor area to be ventilated
- Whether the system is whole-home or single-room
- How easily ducting can be routed through the ceiling or sub-floor
- Access constraints, such as tight roof spaces or heritage-listed features
- The unit’s capacity and the controls you choose
Some households ask about payment arrangements.
Step-by-Step Heat Recovery Ventilation Installation Process
A typical installation follows a clear sequence, but the quality of the result is decided in the planning and commissioning stages rather than in the physical mounting. The walkthrough below adds the sizing, safety and verification detail that most guides leave out.
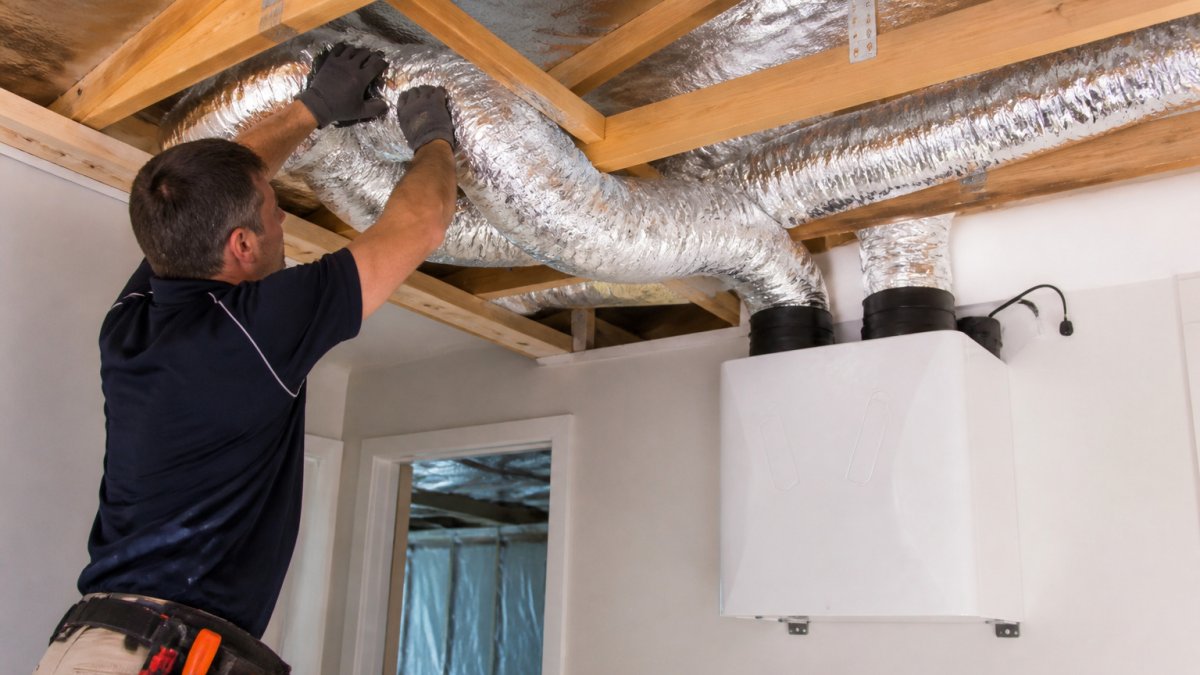
- Assess the home and size the system. Before choosing a unit, work out the ventilation demand. A whole-home HRV is generally sized from floor area, occupancy and room use, with cross-checks against the manufacturer’s capacity tables. Room-by-room supply and extract targets matter more than a single whole-house figure. Bedrooms and living areas need continuous supply; kitchens, bathrooms and laundries need extract. Record these targets in a schedule before any duct is run.
- Choose the unit location. Pick a spot with short, straight duct runs, drainage for condensate where required, and enough clearance for filter and core access. Roof spaces, sub-floor voids and service cupboards are common, but each has trade-offs: roof spaces can overheat in summer and sub-floors can be damp, so insulation and condensate management are essential.
- Plan the ducting route. Map supply and extract paths to each room, keeping them separate and as direct as possible. Check for fire-rated walls, structural members and services before committing to a route. Where ducts must pass through fire-rated elements, fire stopping is required and should be detailed in the plan.
- Install the first fix. Mount the unit on a stable base with isolation mounts to reduce vibration, run the ducting, and create the external wall openings for the fresh-air intake and stale-air exhaust. Keep intake and exhaust well separated so exhaust air is not drawn back in, and position the intake away from flues, exhausts and busy road edges where possible.
- Connect the controls and electrical work. HRV units are typically hard-wired, so electrical connection must be carried out by a licensed electrician and comply with AS/NZS 3000. Mount controllers where they are accessible, and confirm boost or timer functions work before ceilings are closed.
- Seal, insulate and finish. Seal duct joints and penetrations, insulate ducts in cold or humid spaces to prevent condensation, and fit grilles and terminal covers. Check that every duct run is straight, supported and free of kinks or crushed sections before the ceiling is closed.
- Commission and verify. Measure airflow at every supply and extract point, adjust dampers or fan settings to match the design schedule, and record the results. Confirm the system runs quietly, that condensate drains correctly, and that the intake and exhaust terminals are clear.
Retrofit constraints are where most installations go wrong. Limited ceiling space, long duct runs and awkward roof geometry increase pressure losses and can force the unit to run harder and louder. If the building cannot accommodate the duct sizes the design needs, the system will not deliver the airflow it was sized for, no matter how good the unit is.
Ask for the commissioning record at handover. It should list the measured supply and extract flows for each room, the fan setting used, and any adjustments made. That record is your baseline for future service visits and for any warranty discussion.
Installation is not a purely DIY task. Electrical work, fire stopping and condensate drainage call for a licensed installer or appropriately qualified trades.
The table below summarises the core installation steps and the point at which each one is checked.
| Step | What to do | Timing or check |
|---|---|---|
| Assess and size | Work out ventilation demand and room targets | Before choosing a unit |
| Choose location | Short, straight runs and condensate drainage | Before mounting |
| Plan ducting | Map supply and extract paths | Before committing to route |
| First fix | Mount unit, run ducts, create wall openings | Before ceilings close |
| Electrical and controls | Hard-wired by a licensed electrician | Confirm boost and timer work |
| Seal and insulate | Seal joints, insulate cold or humid ducts | Check runs before ceiling closes |
| Commission | Measure airflow at every point and adjust | At handover, keep the record |
HRV Ducting Requirements for Supply and Extract Air
Ducting carries fresh air in and stale air out, so its layout and sizing matter as much as the unit itself. Our complete guide to ventilation hygiene covers keeping the duct system clean and effective. Most installation problems trace back to duct design rather than the HRV, which is why this section deserves more attention than the unit selection.
Keep runs short, straight and sized to the airflow. Every bend, length of flexible duct and reduction adds pressure loss. The unit’s fan curve tells you how much static pressure it can overcome at a given airflow, so the duct design must stay within that budget. A common pattern is to use rigid ducting for the main runs and limit flexible duct to short final connections at the grilles. Undersized duct is the most common cause of noisy systems and low airflow at the far ends of the house.
Separate supply and extract. Supply ducts should reach living areas and bedrooms, while extract ducts should serve wet rooms and the kitchen. Keep the two networks separate and clearly labelled so they are not cross-connected during installation or future maintenance.
Insulate where condensation can form. Ducts passing through cold roof spaces, sub-floors or other unconditioned zones should be insulated to prevent condensation on the duct surface. In humid conditions, uninsulated extract ducts can drip, and the resulting moisture can damage ceilings and insulation.
Plan for fire stopping and penetrations. Where ducts pass through fire-rated walls or ceilings, fire stopping is required and must be detailed before work starts. External wall penetrations for the intake and exhaust should be sealed and weatherproofed, and the terminals should be positioned so exhaust air is not drawn back into the intake.
Allow for maintenance access. Filters, the heat exchanger core and any dampers need to be reachable without dismantling ceilings. Leave access panels or service hatches at the unit and at any inline components.
Check against the manufacturer’s instructions and applicable requirements. Duct sizing, insulation and clearances should follow the manufacturer’s installation manual and the ventilation and building requirements that apply to your project. Your local building authority can confirm which requirements apply to your property.
Guidance on ventilation ductwork and installation standards
Good duct design is about pressure loss, separation, insulation and access. If any of those four is compromised, the system will underperform even if the unit itself is correctly sized.
Commissioning and Airflow Balancing for a Heat Recovery Ventilation System
Commissioning confirms that the system moves the right amount of air through each room. Without it, some rooms may get too much airflow while others get too little.
A licensed installer typically measures airflow at every supply and extract point and adjusts dampers or fan settings until the readings match the design. They then record the results so you have a reference for future service visits.
Ask for a written balancing record at handover. It shows whether the system is performing correctly and gives you a baseline if problems appear later.
Booking Your HRV Installation and Ongoing HRV System Maintenance
Heat recovery ventilation installation is a job for a licensed professional, and the system needs regular maintenance afterwards to keep working well. Filters should be cleaned or replaced on the schedule set by the manufacturer.
If you want to ventilate your home properly, contact Doctor Damp Ventilation through contact our team today. Call 1300 557 687 to start the conversation.
Frequently Asked Questions
How much does it cost to get a heat recovery ventilation system installed?
Costs depend on the number of rooms served, the building layout, how much ducting is needed and whether the work is a retrofit or part of new construction. The supplied research does not provide verified price ranges, so pricing should be confirmed by a quote. Current pricing depends on the project and is confirmed by a quote.
Can a heat recovery ventilation system be installed in an existing home?
Yes, though retrofits need more planning than new builds. The installer must find routes for supply and extract ducting, choose suitable locations for the unit and outdoor air intake, and check that the ceiling or sub-floor space can accommodate the work. A single-room unit may suit homes where whole-house ducting is impractical, and a site assessment will show which option fits the building.
How long does heat recovery ventilation installation take?
Duration depends on the house size, the number of outlets and how accessible the ducting routes are. Installation usually follows a sequence of first fix ducting and unit placement, second fix connections and controls, then commissioning. Your installer can give a project timeline after inspecting the property, and planning for disruption to the household is worth discussing at the start.
How often should an HRV be serviced?
Filters should be checked and cleaned or replaced according to the manufacturer’s instructions, and the system should be inspected periodically to confirm airflow and fan performance. Keeping the outdoor air intake and extract grilles clear helps maintain airflow.
Doctor Damp Ventilation is fully licensed and has over a century of experience with sub-floor ventilation, moisture control and indoor air quality solutions. Call 1300 557 687 for a consultation.

