
Table of Contents
- Why Bathroom Vent Repair Matters
- What You’ll Need Before Starting
- Diagnosing Why Your Bathroom Exhaust Fan Isn’t Working
- Cleaning Your Bathroom Exhaust Fan Properly
- Fixing a Noisy Bathroom Exhaust Fan
- Bathroom Exhaust Fan Repair Cost and Repair vs Replacement
- Replacing Your Bathroom Exhaust Fan
- Testing Ventilation Performance After Repair
- Frequently Asked Questions
Last Updated: October 19, 2026
Why Bathroom Vent Repair Matters
A bathroom exhaust fan that stops working creates real problems fast: moisture builds up, mould appears on walls and ceilings, and the air feels thick and smells musty.
At Doctor Damp Ventilation, we’ve spent over a century helping homeowners solve exactly this problem. A properly functioning bathroom vent repair isn’t optional. It’s the difference between a healthy home and one where dampness takes over.
A broken bathroom exhaust fan doesn’t just affect comfort. Moisture settles into walls, insulation, and timber framing, inviting mould growth that triggers respiratory issues, especially for children and older family members.
Most bathroom vent problems are fixable: some need only cleaning, others a new motor or ducting adjustment, and a few professional replacement.
A working bathroom exhaust fan removes moisture before it damages your home. Most repairs take less than an hour if you follow the right steps.
What You’ll Need Before Starting
Gather these before opening the fan or touching any electrical components:
- Flathead and Phillips head screwdrivers
- Adjustable wrench or socket set
- Torch or headlamp (you’ll need light inside the ductwork)
- Dust mask and safety glasses
- Vacuum with hose attachment
- Soft brush or old toothbrush
- Damp cloth or sponge
- Electrical tester or multimeter (for checking power)
- Step ladder or sturdy stool
- Gloves (cotton or nitrile)
Safety first: Turn off the power at the circuit breaker before touching anything inside the fan, and wait 5 minutes for residual charge to dissipate. Never assume the fan is off just because it’s not running. If you’re uncertain about electrical work at any point, stop and call a licensed electrician, electrical faults cause fires.
Diagnosing Why Your Bathroom Exhaust Fan Isn’t Working
The fan won’t turn on, starts then stops, or runs but barely moves air, each symptom points to a different problem. Start with the simplest diagnosis and work toward more complex issues only if earlier steps don’t reveal the fault.
Check the wall switch and power supply
The wall switch is the first place to look. Flip it on and off several times and listen for a click. A switch that clicks and feels normal is probably fine; one that feels loose, makes no sound, or feels stuck often needs replacement.
Next, check the circuit breaker. Look for one labeled “bathroom vent” or “exhaust fan” and flip it back to ON if it’s OFF. If it flips back immediately, you have an electrical fault, stop and call a licensed electrician.
Use an electrical tester to confirm power reaches the switch. Place the tester probe on the live wire (usually red or black). If the tester lights up, power is present. If it doesn’t, the circuit is dead and the fan won’t run.
Never assume a switch is safe just because it looks normal. A faulty switch can cause electric shock or fire. If you’re unsure, stop and call a professional.
Inspect the ducting and exterior vent
A blocked duct is the second most common reason a fan fails to move air: the motor spins, but air can’t escape. Turn on the fan and hold your hand near the exterior vent opening, strong air movement means it’s clear; nothing or weak suction means it’s blocked.
Blockages happen three ways:
- Dust and lint accumulate inside the duct over months
- The exterior vent cover gets clogged with debris
- Ducting disconnects or collapses inside the wall
Inspect the exterior vent opening for leaves, dirt, or insect nests and clear any visible debris by hand; remove and thoroughly clean a heavily clogged cover. Then open the fan housing, shine a torch down the duct, and check where it connects to the fan, matted lint or dust is your blockage.
Flexible ducting that’s been crushed or kinked will block airflow completely. If you can access the duct in the ceiling or wall, straighten any kinks. Rigid metal ductwork rarely kinks, but it can disconnect at joints.
Test the fan motor and blades
If power reaches the fan and the duct is clear, the motor itself may be faulty. If it hums but the blades don’t spin, something blocks them, turn off the fan immediately, as dust or debris often jams the blades. If the motor makes no sound at all, it has likely failed and needs replacement.
With the fan and power off, spin the blades with your finger, they should rotate freely; stiffness means stuck debris or a worn bearing. A humming motor that doesn’t spin usually means the capacitor has failed. This small cylindrical component gives the motor its starting “kick,” wears out over 10-15 years, and is inexpensive to replace but requires electrical knowledge.
Cleaning Your Bathroom Exhaust Fan Properly
Most bathroom vent problems start with dust. Dust blocks airflow, jams motors, and reduces suction. Regular cleaning prevents 80% of fan failures.
Remove dust and debris from fan blades
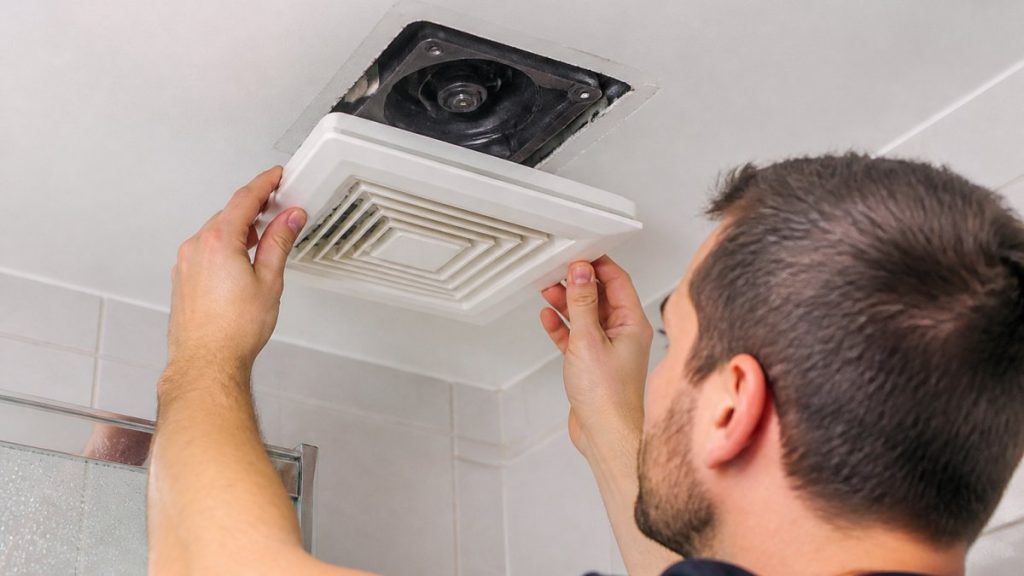
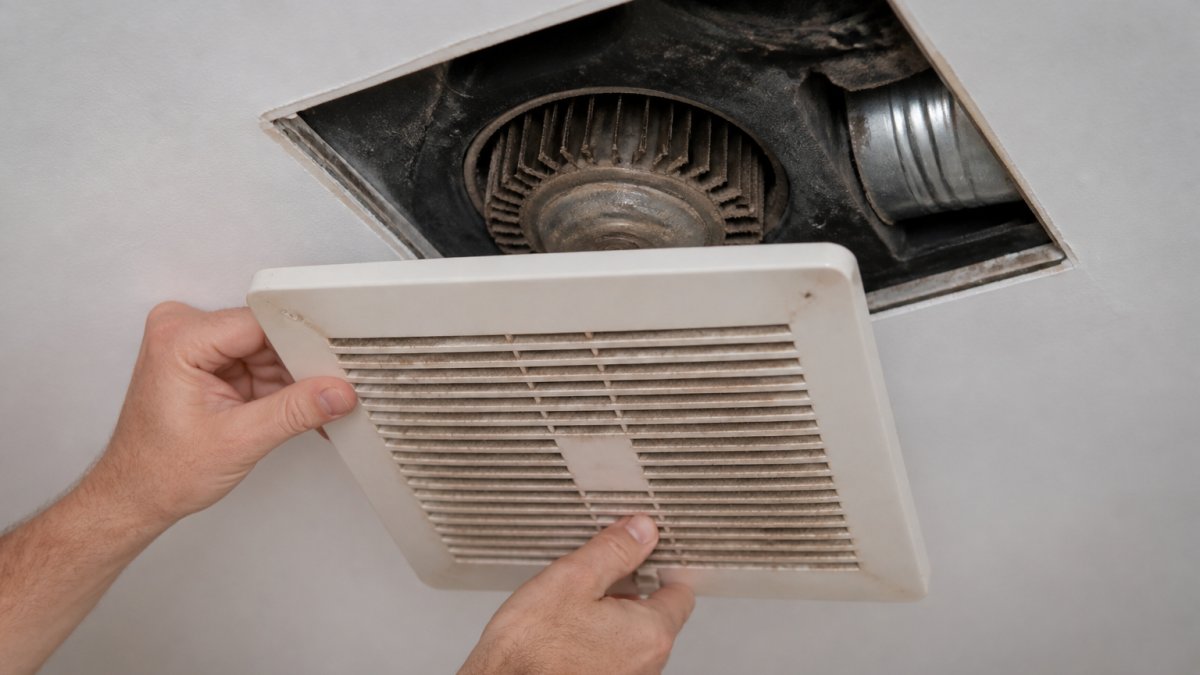
Turn off power at the circuit breaker, wait 5 minutes, and open the fan grille by unclipping it or unscrewing the mounting bracket. Gently remove dust from each blade with a soft brush or old toothbrush, working over a bin or cloth and never forcing the delicate blades. For stubborn dust, use a barely damp cloth, wet dust clogs more than dry dust, and let the blades air dry completely before turning the fan back on. Never use a pressure washer or hose on the motor.
Clear the grille and ducting
The grille traps dust before it reaches the motor, so clean it every 3-4 months: remove it, rinse under warm water, scrub with a soft brush (soaking in warm soapy water for 10 minutes first if heavily soiled), and dry it completely before reinstalling. For ducting, if it runs through an accessible attic or ceiling space, clean it from inside with a vacuum hose attachment, working carefully to avoid damage.
If the duct is buried in walls or runs underground, cleaning is difficult. Call a professional. Doctor Damp Ventilation has specialised equipment to clear blocked ducts without opening walls.
Cleaning the grille monthly keeps the fan running efficiently. A clean grille reduces strain on the motor and extends its lifespan by years.
Fixing a Noisy Bathroom Exhaust Fan
A quiet fan is a healthy fan. Noise signals a problem.
Humming or rattling noises
A low hum is normal; a loud hum or buzzing means the motor is struggling, usually from dust jamming the blades or a wearing bearing. Clean the blades first, nine times out of ten that solves the hum. Rattling comes from loose components: tighten any loose motor bracket bolts and duct connections, and replace a cracked or poorly seated grille.
If rattling continues after tightening, the bearing inside the motor is likely worn. Replacement is the next step.
Lubrication and bearing maintenance
Older fan motors (more than 10 years old) may have oil ports that benefit from a drop of electric motor oil, never general-purpose oil or WD-40, which can damage motors. Apply one drop to each port; more creates mess and attracts dust. Modern motors are sealed and cannot be oiled, so skip this step if your fan is less than 10 years old.
Bearings that are worn cannot be restored with oil. Replacement is the only fix. A worn bearing sounds like grinding or squealing and gets louder over time.
Bathroom Exhaust Fan Repair Cost and Repair vs Replacement
The decision to repair or replace depends on age, cost, and how long you plan to stay in your home.
When to repair versus replace
Repair if:
- The fan is less than 10 years old
- The fault is electrical (bad switch, tripped breaker)
- The fault is a blocked duct or dirty grille
- The motor hums but blades jam (usually fixable with cleaning)
Replace if:
- The fan is more than 15 years old
- The motor no longer runs or makes grinding sounds
- The housing is cracked or damaged
- Repairs would cost more than half the price of a new unit
A new bathroom exhaust fan costs $200-$800 depending on quality, noise rating, and features, plus $300-$600 for installation by a licensed electrician. Repair costs vary: cleaning is free if you do it yourself, a new grille costs $30-$80, a capacitor replacement $100-$200 with labour, and motor replacement $400-$700. A 12-year-old fan with a failed motor usually warrants replacement for a quieter, more efficient unit with a warranty; a 5-year-old fan that just needs cleaning clearly warrants repair.
When to call a licensed electrician
Stop and call a professional immediately if:
- The circuit breaker trips when you turn on the fan
- You smell burning or see scorch marks inside the housing
- The switch feels hot to the touch
- You’re unsure about electrical safety at any point
- The fan has water damage or corrosion
Electrical faults are fire hazards, and a licensed electrician can diagnose and fix them safely. The cost of a service call is worth the safety.
At Doctor Damp Ventilation, we diagnose ventilation problems and coordinate repairs. If the issue is electrical, we bring in a qualified tradesperson. If it’s structural, like a duct that’s disconnected or ducting that’s causing moisture to back up into the home, we handle that too.
Never ignore electrical warning signs. A small fault today becomes a fire hazard tomorrow. Call a professional.
Replacing Your Bathroom Exhaust Fan
If repair isn’t an option, replacement is straightforward for a homeowner with basic skills, or a job for a licensed electrician if you’re uncertain.
Turn off power at the circuit breaker. Remove the old grille, disconnect the duct by loosening the hose clamp or duct connector, and unscrew the motor housing from the ceiling. Photograph the wire connections before disconnecting so you can reconnect the new fan correctly. Install the new fan in reverse order: secure the housing, connect the wires (usually black to black, white to white, green or bare to ground), reconnect the duct, and reinstall the grille. Turn on power and test, the fan should run smoothly with minimal noise.
If you’re unsure at any step, call a licensed electrician. Incorrect wiring creates fire risk.
Testing Ventilation Performance After Repair
After you repair or replace the fan, confirm it’s working properly.
A properly functioning bathroom vent removes moisture quickly and keeps the space dry.
Bathroom vent repair often feels overwhelming, but most problems have simple solutions. Cleaning fixes the majority of faults, while electrical issues demand professional help from a licensed electrician.
At Doctor Damp Ventilation, we diagnose ventilation problems that go beyond the fan itself. If your bathroom vent repair reveals a deeper ventilation problem, we’re here to help. Call us on 1300 557 687 for a consultation.
Frequently Asked Questions
Why has my bathroom exhaust fan stopped working?
A bathroom exhaust fan stops working for several reasons: a tripped circuit breaker, a faulty wall switch, a blocked vent duct, or a failed motor. Start by checking the power supply and wall switch. If those are fine, inspect the exterior vent and ducting for blockages caused by dust buildup or debris. If airflow is clear, the motor may have failed and require professional service or replacement.
How much does bathroom exhaust fan repair cost?
Repair costs depend on the fault. Simple fixes like cleaning ducting or replacing a wall switch cost little and can be DIY. Motor repairs or component replacements typically require a professional service call. Replacement of the entire fan unit varies by model and installation complexity. For an accurate quote specific to your situation, contact a licensed ventilation specialist who can diagnose the fault and provide pricing.
Can I clean a bathroom exhaust fan myself?
Yes. Turn off power at the circuit breaker first. Remove the grille and vacuum dust from the fan blades and housing. Use a soft brush to dislodge debris from the motor and ducting. Avoid excessive moisture around electrical components. For deeper cleaning inside the motor or if you’re uncomfortable working at height, call a professional. Regular cleaning prevents many common faults and improves airflow and performance.
Do I need an electrician to replace a bathroom exhaust fan?
If the existing wiring and ducting are in good condition, a handy homeowner can replace the fan unit itself. However, if rewiring is needed, the ducting requires modification, or you’re unsure about electrical safety, hire a licensed electrician. Improper installation can create fire hazards, poor ventilation, and moisture problems. A professional ensures the new fan is correctly sized, vented, and complies with building standards.
