
Table of Contents
- Why Underfloor Airflow Matters
- Signs of Poor Subfloor Ventilation
- Diagnosing Your Underfloor Space Before Adding Ventilation
- Subfloor Ventilation Fan vs Passive Vents: Which Approach Works Best
- How to Improve Subfloor Ventilation: Practical Installation Steps
- Subfloor Ventilation Requirements and Building Standards
- Safety, Access, and Seasonal Considerations
- Frequently Asked Questions
Last Updated: October 20, 2026
Why Underfloor Airflow Matters
How to ventilate under a house starts with understanding why it matters. Your subfloor space sits between the ground and your timber floors.
At Doctor Damp Ventilation, we see this problem constantly. Homeowners often don’t realise their underfloor space is suffocating. They notice musty smells or see mould on walls.
The good news is simple: fresh air solves most underfloor moisture problems. Proper subfloor ventilation moves stale, damp air out and draws fresh air in.
Underfloor airflow prevents moisture accumulation that causes damp, mould, and structural rot. Without ventilation, your subfloor becomes a breeding ground for problems that spread to your living spaces.
Signs of Poor Subfloor Ventilation
What moisture damage looks like
Visible signs appear first on floors and walls above the affected subfloor. You might notice soft or springy timber floors. Carpet may feel damp or smell musty even after drying. Paint peels from internal walls. Timber skirtings warp or blacken with mould.
Under the house, the damage is usually worse. Timber stumps and joists turn soft or crumbly. Metal components rust quickly. Insulation absorbs moisture and loses its effectiveness.
Look for these specific warning signs:
- Discolouration or dark staining on timber
- Visible mould growth on joists or stumps
- Soft, spongy timber that dents easily
- Rust on metal brackets or fasteners
- Damp soil or standing water
- Condensation on metal pipes
Health and structural warning signs
Damp subfloors don’t just damage buildings. They affect the people living inside.
Respiratory issues get worse in damp homes. Asthma, allergies, and bronchitis flare up. Children and elderly people suffer most. The mould spores travel up through gaps and cracks into living spaces.
Structurally, moisture weakens everything. Timber loses strength. Concrete cracks. Termites are attracted to damp timber and cause additional destruction. By the time you see major problems, the damage often runs deep.
These signs suggest your subfloor needs attention:
- Persistent musty odours you can’t eliminate
- Family members with worsening respiratory symptoms
- Visible mould on interior walls or ceilings
- Timber that feels soft or looks stained
- Unexplained pest activity
- Rising damp marks on interior walls
If you see soft timber or active mould growth, stop waiting. Moisture damage accelerates quickly. Delaying ventilation work can double repair costs within 12 months.
Diagnosing Your Underfloor Space Before Adding Ventilation
Inspecting access points and crawlspace condition
You can’t fix what you haven’t seen. Before installing any ventilation system, inspect your underfloor space properly.
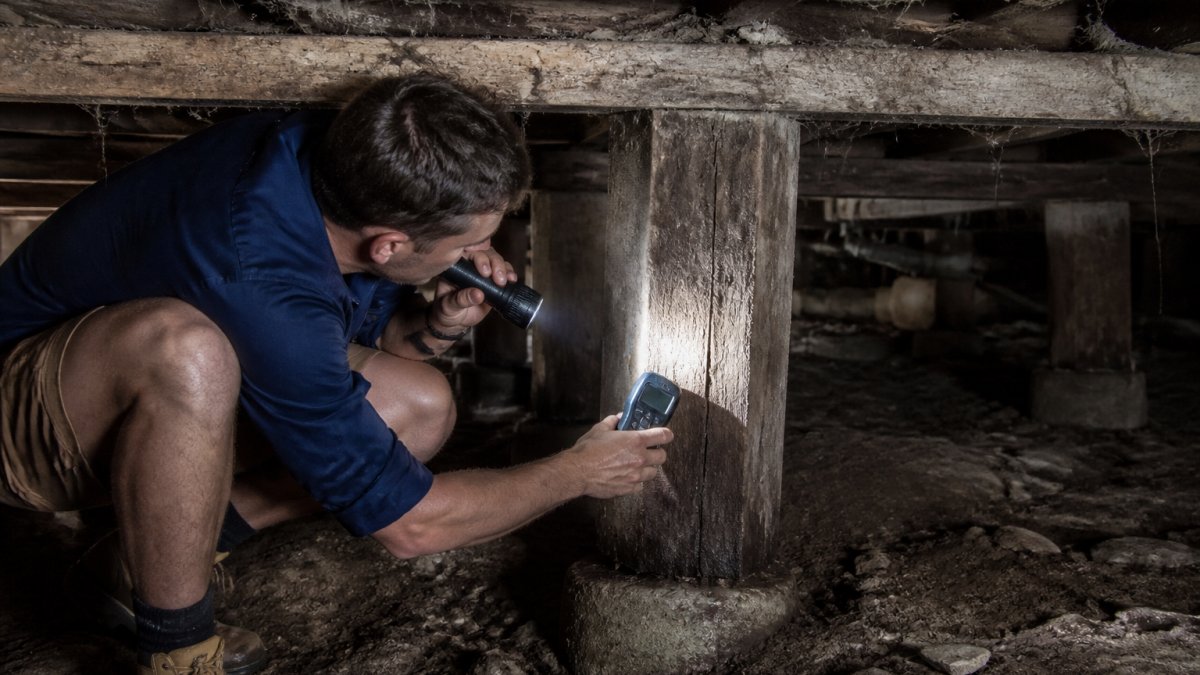
Most homes have access points. Look for removable panels or grates near the foundation. Some older homes have no access at all.
When you enter, move slowly and carefully. Crawlspaces are tight and dusty. Bring a torch and wear protective gear: gloves, dust mask, and long sleeves.
Document what you find:
- Soil type and moisture level (is it wet or dry?)
- Existing vents and their condition (blocked or working?)
- Timber condition (dry, damp, or rotting?)
- Visible mould or pest activity
- Pipe or electrical hazards
- Available space for new ventilation equipment
Take photos if you can. They help professionals understand your situation.
Measuring moisture levels and airflow
Moisture measurement tells you if ventilation will help. A moisture metre costs under $50 and gives instant readings.
Test timber in several locations. Normal readings are below 15%. Readings above 20% indicate moisture problems.
Test soil too. Damp soil directly under your home means groundwater or poor drainage. This affects which ventilation approach will work best.
Airflow is harder to measure yourself, but you can spot obvious problems. Stand near existing vents. Feel for air movement.
Moisture metres are simple to use but can give false readings on metal or treated timber. Take multiple readings from different spots. Look for patterns, not single numbers.
Subfloor Ventilation Fan vs Passive Vents: Which Approach Works Best
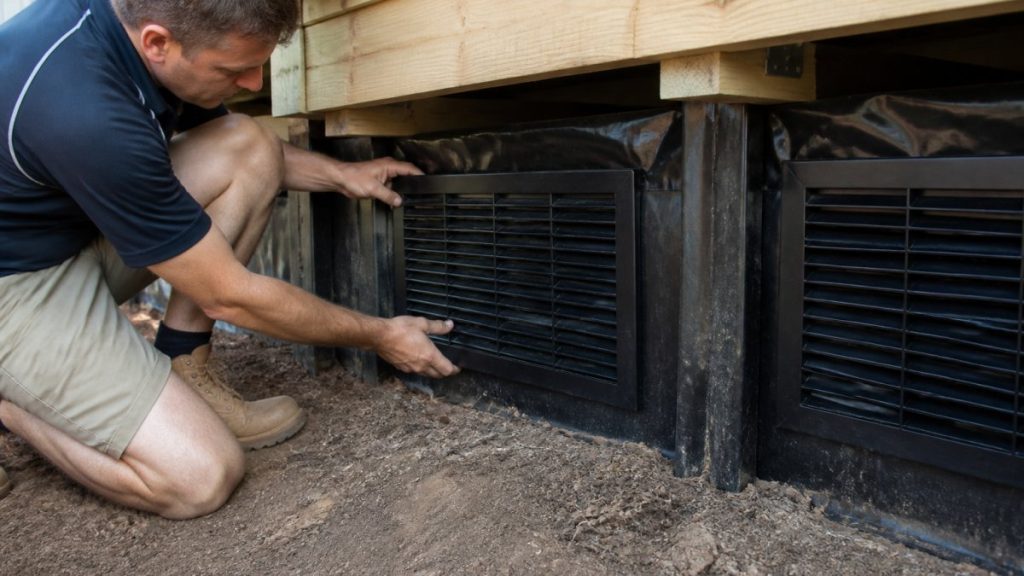
Passive airbricks and grilles for natural cross-ventilation
Passive vents use natural air movement. Hot air rises. Pressure differences push air through gaps. This costs nothing to run and requires no maintenance.
Airbricks are clay or plastic units set into external walls. Grilles are metal or plastic covers over openings. Both allow air to flow under the house naturally.
Passive ventilation works well in these situations:
- Homes with good external wall spacing (opposing walls work best)
- Areas with consistent wind exposure
- Subfloors that aren’t deeply buried
- Homes where electricity access is limited
- Properties in mild climates with moderate moisture
The main limitation is unreliability. On still days, passive vents move very little air. In winter, temperature differences may be too small to drive airflow.
Mechanical fans and ducting for active air exchange
Mechanical ventilation uses fans to force air movement. Fans pull stale air out or push fresh air in. Ducting carries air where it’s needed most.
This approach works in challenging situations:
- Deep crawlspaces far from external walls
- Homes with poor natural airflow patterns
- High-moisture environments requiring constant circulation
- Subfloors with limited access points
- Older homes where adding passive vents is difficult
Mechanical systems cost more upfront and use electricity. But they deliver consistent airflow regardless of weather or season. You control the operation. Many systems run on timers or humidity sensors.
Choosing between passive and mechanical systems
The right choice depends on your situation. Most homes benefit from a mixed approach.
Start with diagnosis. If your subfloor is moderately damp and you have good external wall access, passive vents may be enough.
If moisture stays high or if you have access limitations, mechanical ventilation is worth the investment.
Doctor Damp Ventilation assesses both options for your specific home. We measure your subfloor, check wall placement, and calculate how much airflow you actually need.
Passive vents suit homeowners with good external wall access and mild moisture problems. Mechanical fans are better for deep crawlspaces, high humidity, or homes where passive vents alone won’t work.
How to Improve Subfloor Ventilation: Practical Installation Steps
Step 1: Plan vent placement on opposing external walls
Effective cross-ventilation requires vents on opposite sides of your home. Air enters one side and exits the other. This creates airflow across the entire subfloor.
Measure your home’s perimeter. Identify external walls that run parallel to each other. These are your cross-ventilation axis.
Mark potential vent locations:
- At least 300mm from corners (corners create dead zones)
- Roughly evenly spaced along each wall
- At the same height on both sides (within 300mm)
- Away from downpipes and drainage paths
- Clear of soil banks or obstructions
Spacing depends on your home’s size. Smaller homes need fewer vents. Larger homes need more. As a rough guide, space vents 1.5 to 2 metres apart on each wall.
Step 2: Calculate vent size and spacing requirements
Vent size matters. Too small, and airflow is restricted. Too large, and you waste money and create security gaps.
Most residential subfloors need total vent area of 1 square metre per 100 square metres of floor area.
Airbricks typically provide 0.05 to 0.1 square metres each.
Mechanical fans move air faster. A single 300mm fan can replace 10 to 15 passive vents.
Calculate your specific requirement:
- Measure your floor area
- Divide by 100
- Multiply by 1 to get total vent area needed
- Choose vent types and count how many you need
- Space them evenly along opposing walls
Step 3: Install airbricks or fans with proper ducting
Installation depends on your chosen system.
For passive airbricks, the process is straightforward. Mark positions. Cut holes in external walls. Insert airbricks and seal around edges. This is DIY-friendly if you’re comfortable with basic masonry.
Mechanical fans require more planning. You need to run ducting from the fan to the subfloor space. Ducting must slope slightly to prevent condensation pooling. Seal all joints to prevent air leaks.
Both systems need:
- Proper sealing to prevent air bypassing the subfloor
- Screens or grilles to keep pests out
- Access for cleaning (blocked vents don’t work)
- Safe electrical installation for fans
Step 4: Verify airflow and monitor results
After installation, check that air is actually moving.
Feel near vents with your hand. You should detect air movement on calm days. If you feel nothing, check for blockages. Clear any debris or spider webs.
Monitor moisture levels. Test timber moisture again after two weeks, then monthly. You should see readings drop steadily. If they don’t, something isn’t working.
Smell matters too. Musty odours fade as airflow improves. If the smell persists after a month, your ventilation may not be reaching all problem areas.
Set a reminder to check vents quarterly. Leaves, spider webs, and debris block vents quickly. Five minutes of cleaning keeps your ventilation working at full capacity.
Subfloor Ventilation Requirements and Building Standards
Building codes exist to protect your home. They set minimum ventilation standards for underfloor spaces.
In most areas, the requirement is straightforward: adequate ventilation must prevent moisture accumulation.
Specific requirements vary by location and building age. Older homes often have no ventilation at all. Modern builds must meet current standards.
The best approach is to exceed minimum standards. Minimum ventilation prevents major problems.
Doctor Damp Ventilation designs systems that meet or exceed all relevant standards.
Safety, Access, and Seasonal Considerations
Working safely in crawlspaces and managing hazards
Crawlspaces present real hazards. Never enter without preparation.
Common dangers include:
- Low headroom causing bumps and disorientation
- Unstable debris or collapsed sections
- Asbestos in older insulation or pipes
- Electrical hazards from wiring or equipment
- Poor air quality and oxygen depletion
- Pests including spiders, rats, and snakes
Always wear protective equipment. Dust masks protect your lungs. Gloves protect against splinters and contaminants. Long sleeves and trousers reduce skin exposure. A torch is essential.
Never work alone. Have someone outside who knows you’re in the space. Set a time limit. If you feel unwell or disoriented, exit immediately.
For major work, hire professionals. They have proper equipment, training, and insurance. The cost is worth avoiding serious injury.
Seasonal operation and energy efficiency
Ventilation needs change with seasons. Winter brings cold air and lower moisture levels naturally.
In winter, you may reduce mechanical ventilation slightly. In summer, run fans more frequently.
Energy use is minimal with passive vents. They cost nothing to run.
Ventilation also affects heating and cooling costs. In winter, some heat escapes through vents.
Poor underfloor ventilation creates problems that spread through your entire home.
Call us at 1300 557 687 to arrange an assessment.
Frequently Asked Questions
How do I know if the space under my house needs better ventilation?
Look for musty odours, visible mould or mildew on timber, condensation on pipes, or damp patches on the underside of floorboards. Poor subfloor ventilation often causes rising damp that travels upward into living spaces, leading to peeling paint, soft plaster, or rust stains on walls. If you notice respiratory issues or allergies worsening indoors, inadequate airflow beneath the house may be contributing. A moisture metre reading above 20% in the crawlspace indicates ventilation problems.
Should I install subfloor ventilation myself or use a specialist?
Professional installation is strongly recommended. Specialists assess your specific underfloor layout, calculate correct vent sizing and placement for effective cross-ventilation, and ensure compliance with building standards. They identify hazards like asbestos or pest activity before work begins. DIY installation often fails because vent placement, sizing, and airflow calculations are critical, incorrect work wastes money and leaves damp unresolved. A qualified installer guarantees the system works and protects your investment.
What’s the difference between passive vents and a subfloor ventilation fan?
Passive airbricks and grilles rely on natural pressure differences and wind to move air through the crawlspace. They cost less and require no electricity but work slowly in still conditions. Mechanical fans actively pull or push air, creating faster air exchange and stronger moisture control. Fans work year-round regardless of weather but consume energy. Many homes benefit from a hybrid approach: passive vents for natural airflow plus a fan for active moisture removal during humid seasons or in poorly ventilated spaces.
How long does it take to see improvement in damp and mould after installing ventilation?
Moisture levels typically drop within 1-2 weeks once ventilation is operational and airflow is established. Visible mould and musty odours often improve within 2-4 weeks as humidity decreases. Structural drying of timber can take several months depending on how saturated the underfloor was initially. You’ll notice the most dramatic improvement in indoor air quality and respiratory symptoms within the first month. Proper ventilation maintenance ensures lasting results and prevents mould recurrence.
