
Last Updated: October 27, 2026
Quick Summary
The most common rising damp treatment for brick walls is a chemical damp-proof course injection, which creates a water-repellent barrier in the mortar joints to stop moisture wicking upward. Confirm rising damp is the cause before choosing it, because injection does nothing for water arriving from above.
- Rising damp shows as a tide-mark line, salt crystals and flaking plaster rising no more than about a metre from the floor.
- Injection creams suit softer, older mortars, while injection fluids suit denser, more uniform mortar beds.
- Injection can trap moisture in soft lime mortar, so heritage brickwork may need a breathable approach instead.
- Mechanical damp-proof course insertion or masonry undercutting suits walls where chemical treatment is unsuitable or has already failed.
- Monitor the wall monthly for three months after treatment, then quarterly, to catch any return of damp.
Table of Contents
- Confirm It Is Rising Damp Before You Choose a Treatment
- 1. Chemical Damp-Proof Course Injection
- 2. Mechanical Damp-Proof Course Insertion and Masonry Undercutting
- 3. Sub-Floor and Wall Ventilation
- 4. Lime Replastering and Breathable Finishes for Older Brickwork
- 5. Wall-Drying Devices and Drainage
- DIY Rising Damp Treatment: What You Can and Cannot Safely Do
- How Long Brick Walls Take to Dry After Treatment
- Frequently Asked Questions
Confirm It Is Rising Damp Before You Choose a Treatment
Rising damp is capillary suction of moisture from the ground into porous masonry such as brick and mortar, and it is the most common reason lower walls turn damp, stained and crumbly. NSW Environment and Heritage, Rising damp: Information sheet 2.1 Before you spend money on any rising damp treatment for brick walls, confirm that rising damp is actually the problem. The wrong fix wastes time and money.
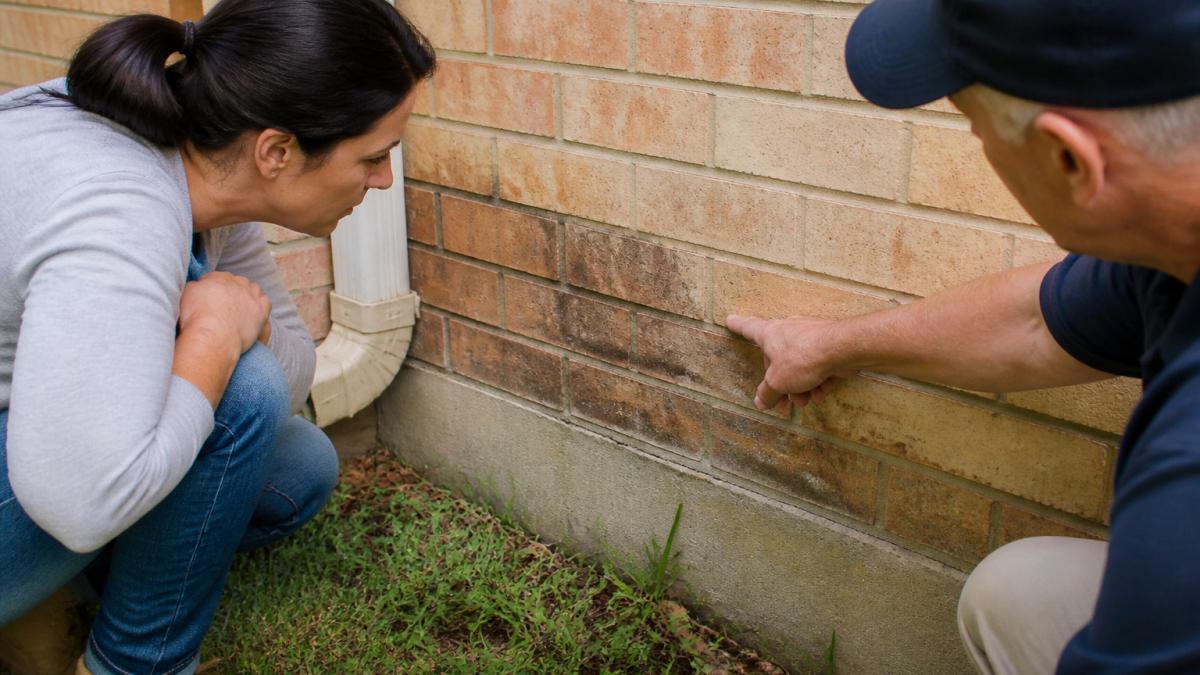
!Homeowner inspecting the base of a brick wall
Rising damp usually shows as a tide-mark line, salt crystals (efflorescence) and flaking plaster rising no more than about a metre from the floor. Our rising damp treatment cost guide sets out what budgeting for injection typically involves, so you can weigh that before committing. If you are unsure, a local specialist can inspect the wall before you commit to any treatment, which is a sensible first step with a book-a-drain-inspection-style visit (Rising Damp Repair Specialist Near Me).
How rising damp signs differ from penetrating damp
Rising damp starts at the footings and climbs upward, so the staining sits low and has a clear edge. Penetrating damp comes through the wall from rain or a leaking gutter, so it tends to show as patches higher up, often after rain, and it may follow cracks or window reveals. Plumbing leaks and condensation produce their own patterns. Getting this distinction right is the single most useful step you can take, because chemical injection does nothing for water coming in from above.
1. Chemical Damp-Proof Course Injection
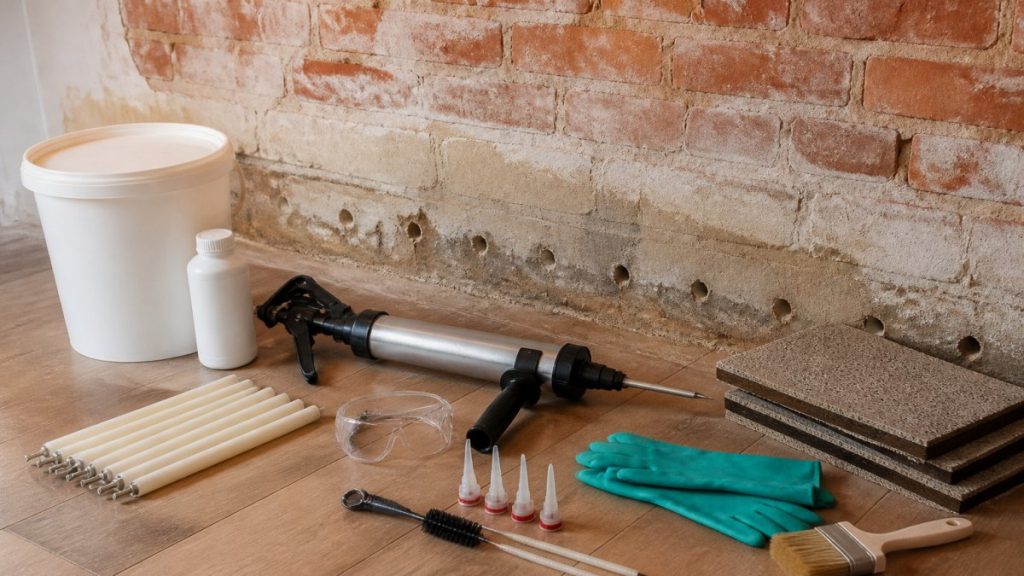
A chemical damp-proof course (DPC) is injected into the mortar joints of the wall to create a water-repellent barrier that stops moisture wicking upward. It is one of the most common responses to confirmed rising damp in brick walls, and it is the least invasive option that actually interrupts the capillary path.
The approach is widely used because it does not require removing the wall. The two main product families behave differently:
- Injection creams. Thixotropic creams are packed into drilled holes and slowly diffuse into the surrounding mortar over days to weeks, forming a water-repellent layer. They are favoured on softer, older mortars because they spread gradually and are less likely to run out of the hole.
- Injection fluids. Low-viscosity fluids are pumped in under low pressure and penetrate quickly. They suit denser, more uniform mortar beds but need careful pressure control to avoid over-saturation and surface bleed.
Both rely on the same principle: the active ingredient (typically a silane or siloxane) lines the pores of the mortar so water can no longer be drawn up by capillary action.
Heritage versus modern brickwork: why suitability is not universal
This is the point most guides gloss over, and it is where injection goes wrong. Traditional brickwork laid with soft lime mortar is vapour-permeable and moves with moisture.
Modern brickwork laid with cement mortar behaves differently: it is harder, less breathable and more uniform, so it generally accepts injection creams and fluids predictably. Before any work, establish the mortar type (a simple scratch test or a mortar analysis), the wall thickness and whether the wall is cavity or solid.
How the injection process works, step by step
- Inspect and map the damp. Measure the height of the damp line and note salt damage and plaster condition.
- Drill injection holes. Holes are drilled at intervals along the mortar joints, usually near the base of the wall, angled slightly downward so the product stays in the wall.
- Inject the product. The treatment is pumped in under low pressure so it spreads through the wall rather than running down the face.
- Allow it to cure and dry. The wall needs time to dry out before replastering. Expect this to take weeks, not days.
- Replaster and monitor. Use a breathable finish and watch for any return of damp over the following months.
What drives the price
Injection does nothing for water arriving from above. If the damp is penetrating damp, a bridged DPC or a plumbing leak, the injection will be wasted money. Confirm the diagnosis before booking.
Safeguard Europe, Rising Damp and its Control
The main injection approaches differ in how they are applied and which mortar they suit.
| Option | Best for | Key difference |
|---|---|---|
| Injection creams | Softer, older mortars | Diffuse slowly over days to weeks |
| Injection fluids | Denser, uniform mortar beds | Penetrate quickly under low pressure |
| Both products | Confirmed rising damp | Form a water-repellent barrier in the pores |
2. Mechanical Damp-Proof Course Insertion and Masonry Undercutting
Mechanical methods physically interrupt the path of moisture. Research published in 2026 reports undercutting as reliable and effective at stopping rising damp, including in significantly damp older buildings. Applied Sciences, An In Situ Investigation of Rising Damp Mitigation
Mechanical work is more invasive than injection. It suits walls where chemical treatment is unsuitable or has already failed, and it generally needs an experienced builder who can keep the structure stable during the work.
3. Sub-Floor and Wall Ventilation
Moisture in the sub-floor or around the base of a wall can make rising damp worse. Improving airflow helps the wall and the sub-floor dry out, which reduces the moisture that feeds the damp line. Ventilation is a supporting measure rather than a standalone cure, so it works best alongside a correct diagnosis.
For many older homes, the question is whether sub-floor ventilation is needed at all. Our guide on subfloor ventilation fan versus passive vents compares the two approaches, and a quick check on whether an older home needs subfloor ventilation can help you decide. Where ventilation is the right answer, we design and install systems. Sub Floor Ventilation Sydney covers that service in more detail.
4. Lime Replastering and Breathable Finishes for Older Brickwork
Sacrificial lime replastering removes failing cement render and replaces it with common air lime plaster. Lime is breathable, so moisture can evaporate through the surface rather than being trapped behind it. For older or conservation-sensitive buildings, this is often the most sympathetic route. Core Conservation, Solving Rising Damp
Lime plaster does not stop water rising on its own. It works best combined with a diagnosed cause and proper drainage, and it is not a substitute for a damp-proof course where one is needed.
5. Wall-Drying Devices and Drainage
Wall-drying devices and drainage are two further options. Wall-drying devices draw moisture out of masonry, while drainage removes water from around the base of the wall so it cannot build up against the footing. A comparison of these methods looks at purpose, installation and any additional work required. Humidistop, Rising damp treatment: comparing methods and purpose
Each approach has limits, and the research notes that current methods do not work in every case. A specialist can recommend which option, if any, matches your wall.
DIY Rising Damp Treatment: What You Can and Cannot Safely Do
Some preparatory steps are safe for homeowners. You can clear soil and debris that sits above the damp-proof course level, improve ventilation where it is simple to do, and check the outside of the wall for blocked drains or downpipes. Recording the height and pattern of the damp also helps any specialist you call later.
Injection, mechanical work and any treatment that involves drilling into structural masonry should be left to professionals. Getting the diagnosis wrong and treating the wrong problem is the most common and costly DIY mistake, and a dehumidifier or sealant alone rarely fixes rising damp.
How Long Brick Walls Take to Dry After Treatment
Drying time depends on how wet the wall was, the treatment used, the wall thickness and the weather. After injection, the wall usually needs several weeks before replastering, and it can take months for the masonry to reach a stable moisture level. Replastering too early traps moisture and can cause the new finish to fail.
As a rough pattern most practitioners work to:
- Weeks 1-4 after injection: the wall is still shedding moisture. Leave the plaster off or use a temporary breathable finish. Do not seal, paint or tile.
- Weeks 4-12: the bulk of the free moisture evaporates. This is the earliest sensible window for lime or breathable replastering, and only once a moisture meter shows the masonry trending downward.
- Months 3-12: the wall continues to dry slowly, especially thick solid brickwork. Salt may continue to migrate to the surface during this period.
A post-treatment monitoring schedule most guides skip
The fix is not the end of the job. Rising damp recurs when the original cause was only partly addressed, so build a simple monitoring routine into the first year:
- Monthly for the first three months. Take moisture readings at the same points (mark them with a pencil) and photograph the base of the wall. Look for the tide line creeping back up.
- Quarterly for the rest of the first year. Check for new efflorescence, blistering paint or soft plaster. Salt coming back is a signal that moisture is still moving.
- Annually thereafter, before the wet season. Re-check external ground levels against the DPC, clear debris from air bricks and sub-floor vents, confirm downpipes and drains are discharging away from the footing, and inspect the mortar joints at the base for erosion.
Record the readings. A slow downward trend is success even if the wall still feels damp to the touch; a flat or rising trend means something is still feeding the wall.
What to do if damp returns
If damp reappears, the treatment may not have failed for good. The cause can be drainage, ventilation or a bridged DPC rather than the barrier itself.
Treat drying as a monitored process, not a single event.
Frequently Asked Questions
How to stop rising damp in brick walls?
Rising damp is stopped by cutting the capillary path that draws ground moisture into the brickwork. The most common approaches are an injected chemical damp-proof course, a mechanical damp-proof course, improved sub-floor ventilation, or drainage that lowers the ground level against the wall. Which one fits depends on a site assessment, because the cause must be confirmed first. Treating the wrong cause wastes money and can leave the wall damp. Request current pricing or a quote through the website.
What is the best way to treat a damp brick wall?
There is no single best method for every brick wall. Rising damp is usually treated with an injected chemical damp-proof course, which is the most widely used option when the diagnosis is correct. Penetrating damp from rain is handled differently, often with masonry protection or repointing. Older solid walls may suit lime replastering, while sub-floor moisture responds to ventilation. The right choice depends on the wall construction, the moisture source and whether the building is a heritage property, so a professional assessment is the reliable starting point.
Can I treat rising damp myself?
Some preparatory steps are safe to do yourself, such as clearing soil or debris that sits above the damp-proof course line, improving airflow, and monitoring moisture with a meter. Injecting a damp-proof course or cutting into masonry is more complex. Incorrect injection can fail to stop moisture, and drilling into brickwork without knowing the structure can cause damage. Confirm the diagnosis first, then decide which steps you can safely handle and which need a specialist.
Does a chemical damp-proof course work on brick walls?
A chemical damp-proof course is widely used on brick walls when rising damp has been correctly diagnosed, and the cited guidance describes it as a common and effective option in that case. It does not suit every wall. Some traditional masonry walls should not be treated with standard chemical damp-proofing products, so the wall type must be checked first. A chemical course also does not fix the mould or plaster damage already present, which may need separate repair.

